Installing for On-Premise
Attention
The installation instructions on this page are for installing Document Creator in an on-premise Dynamics NAV or Dynamics 365 Business Central environment. If you are looking for installation instructions for Dynamics 365 Business Central online (SaaS/Cloud), then please follow the steps on the page Installing the Extension.
Prerequisites
Before installing the "Document Creator" app, please check if the following prerequisites are met:
- The Business Central/NAV license should have access to the Apportunix Suite ISV module. If you encounter any issues with missing permissions, please ensure you have downloaded a new Business Central/NAV license from Microsoft PartnerSource Business Center and that you have restarted your server instance(s) after uploading your license to the database.
- After the installation of the Business Central extension, you should set up your subscription via the Apportunix Subscriptions page (recommended), or via the Document Creator Setup page using a Document Creator product key registered for your Business Central/NAV license's Serial No./VOICE ID/PSBCID (legacy).
- For installation and activation instructions of the Document Creator stand-alone Designer for Dynamics 365 Business Central, please consult the Installing the Designer documentation page.
Attention
If you do not meet these prerequisites but would like to try out Document Creator, then we advise to install Document Creator into a Business Central online Sandbox environment, from Microsoft AppSource, in which you can use the app without any restrictions.
For additional support, please visit our Support page to get in contact with our support engineers.
Supported Versions
With the latest Document Creator release the following minimum on-premise target versions are officially supported:
| Folder | Dynamics NAV/BC Version |
|---|---|
NAV 8.0.0.0 (CU01) |
2015: W1 8.00 Build 38457 (Cumulative Update 1) |
NAV 9.0.0.0 |
2016: W1 9.00 Build 42815 |
NAV 10.0.0.0 |
2017: W1 10.0 Build 13682 |
NAV 11.0.0.0 |
2018: W1 11.0 Build 19394 |
NAV 13.0.0.0 |
BC13: W1 13.0 Build 24623 (Fall '18) |
NAV 14.3.0.0 |
BC14: W1 14.3 Build 34444 (Spring '19, Cumulative Update 2) |
BC 15.0.0.0 |
BC15: W1 15.0 Build 36510 ('19 release Wave 2) |
BC 16.2.0.0 |
BC16: W1 16.2 Build 13779 ('20 release Wave 1) |
BC 17.0.0.0 |
BC17: W1 17.0 Build 16993 ('20 release Wave 2) |
BC 18.0.0.0 |
BC18: W1 18.0 Build 23795 ('21 release Wave 1) |
BC 19.1.0.0 |
BC19: W1 19.1 Build 32186 ('21 release Wave 2) |
BC 20.2.0.0 |
BC20: W1 20.2 ('22 release Wave 1) |
BC 21.0.0.0 |
BC21: W1 21.0 ('22 release Wave 2) |
BC 22.0.0.0 |
BC22: W1 22.0 ('23 release Wave 1) |
BC 23.0.0.0 |
BC23: W1 23.0 ('23 release Wave 2) |
BC 24.0.0.0 |
BC24: W1 24.0 ('24 release Wave 1) |
BC 25.0.0.0 |
BC25: W1 25.0 ('24 release Wave 2) |
BC 26.0.0.0 |
BC26: W1 26.0 ('25 release Wave 1) |
BC 27.0.0.0 |
BC27: W1 27.0 ('25 release Wave 2) |
Attention
Missing runtime packages (.app files) for a supported release? Reach out to our Support team, and we will add the required packages.
Attention
Please check our Technical Support Agreement (Appendix C) for more information about which BC on-premise versions are actively supported.
Installation
This chapter describes the installation procedure for the following NAV/BC target versions:
- Dynamics 365 Business Central 2019 release Wave 2 and up (BC15+)
- Dynamics 365 Business Central Spring '19 Release (BC14)
- Dynamics NAV 2015 – 2018 and Dynamics 365 Business Central Fall '18 Release (BC13)
Dynamics 365 Business Central 2019 release Wave 2 and up (BC15+)
The installation files are grouped into a directory for each target version (e.g., BC 15.0.0.0 corresponds to Dynamics 365 Business Central 2019 release Wave 2). Make sure to use the files from the directory that matches your target.
You will need to install both the Document Creator and Document Creator On-Premise app.
-
The Document Creator app contains all the features available for both On-Premise and SaaS installations, i.e., creating/editing/importing/exporting/archiving layouts, export profiles, reports, etc.
-
The Document Creator On-Premise app is an extension on the Document Creator app which makes it use an on-premise installation of the report engine. It also includes the features that are only available on-premise, e.g., the RDLC layout converter and direct printing to printers installed on the server. (Optional, starting from Document Creator, version 2.0 (BC20.0))
For Microsoft Dynamics 365 Business Central on-premise the extension can be installed using the Business Central Administration Shell. Please follow the instructions that can be found on the How to: Publish and Install an Extension v2.0 - Business Central | Microsoft Docs page. If you are upgrading from a previous version, then please see Upgrading Extensions - Business Central | Microsoft Docs for instructions on how to perform an upgrade with the cmdlets of the Business Central Administration Shell.
To install Document Creator, please follow these steps:
-
Publishing and installing the dependencies
Download and install the dependencies: "System Library", "Bridge", "Monet" and "PDF Merge".
-
Publishing the "Document Creator" extension
Open the Business Central Administration Shell (as admin) and run the following command to publish the new extension to your database:
Publish-NAVApp -ServerInstance $ServerInstance -Path "...\App\Apportunix_Document Creator_$version.app"(With
$versionbeing the version of the app you are going to install and$ServerInstancebeing the name of the target BC server instance.) -
Installing the "Document Creator" extension
If you are not upgrading from a previous version of the extension, see 2.A.
If you are upgrading from a previous version of the extension, see 2.B.
A. Install the extension either through the Install action on the Extension Management page, or run the following command(s):
Sync-NAVApp -ServerInstance $ServerInstance -Name "Document Creator"
Install-NAVApp -ServerInstance $ServerInstance -Name "Document Creator"
B. At this point you will have two versions published to the database. In the Extension Management page you will see the old version is Installed, while the new version is only Published/Not installed.
Please, first uninstall the Document Creator On-Premise app.
Run the following commands to sync the app and start the data upgrade:
Sync-NAVApp -ServerInstance $ServerInstance -Name "Document Creator" -Version $version
Start-NAVAppDataUpgrade -ServerInstance $ServerInstance -Name "Document Creator" -Version $version
At this point, you will still have two versions of the extension published, but now the new version is installed and the old version only published.
-
Publishing and Installing the "Document Creator On-Premise" extension (Optional, starting from Document Creator, version 2.0 (BC20.0))
Important
If you would like to adhere to the new "Universal Code" initiative from Microsoft, then you should NOT install this extension. Installing the "Document Creator On-Premise" requires the "Implemented code is not cloud-optimized" extension for Business Central licenses acquired after 2022-10-03. Please find more information on the "Universal Code" initiative on aka.ms/BCUniversalCode.
For your considerations on whether to install the extension, the "Document Creator On-Premise" extension applies the following extensions to the "Document Creator" app:
- A control add-in is used instead of the API for rendering reports.
- The Redirect Printers feature, to allow for direct printing to printers installed on the server.
- The RDLC Layout Converter feature, to convert built-in RDLC layouts to Document Creator layouts.
Caution
Please make sure that the .NET Desktop Runtime and Microsoft.WindowsDesktop.App are installed on the machine on which the Business Central server instance(s) is/are running.
Please see our F.A.Q.-entry We run into an error that says “A task was canceled.”. What can we do about this? for more information.
Please, follow the same instructions from step (2) and (3) to publish and install the Document Creator On-Premise app.
-
Open the Setup Wizard
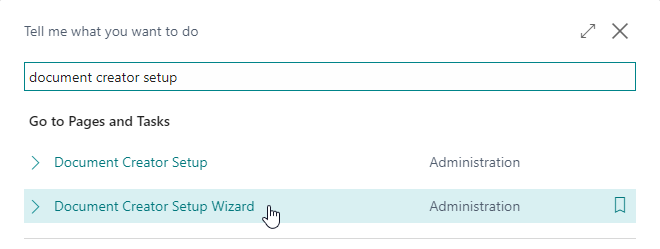
Use the Tell Me search feature in Business Central, search for and open the Document Creator Setup Wizard page. You can also find the setup wizard in the Assisted Setup page (where you will also find setup wizards for other applications and features).
-
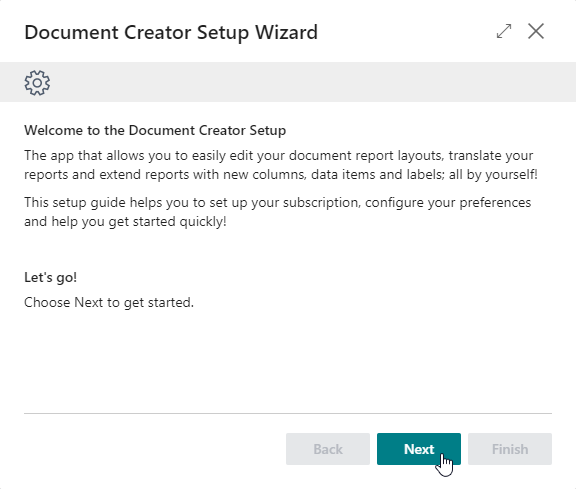
Follow the Setup Wizard
Follow the Document Creator Setup Wizard to set up the extension.
-
Assign the "Apportunix Document Creator" permission set(s) to your users
Please see Permission Configuration.
-
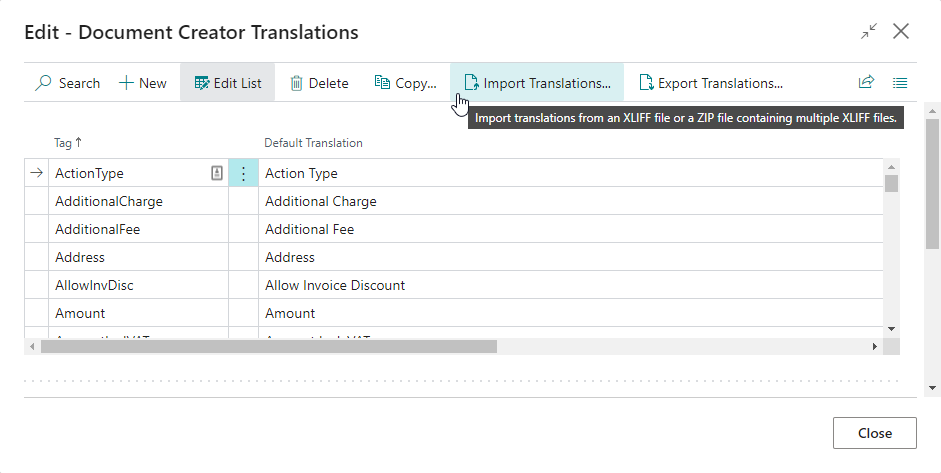
Import the Customizable Label Translations Package
If you have not imported the translations yet, then please follow the installation instructions in the Label Translations Template Package section of the manual.
Document Creator is ready for use!
Dynamics 365 Business Central Spring '19 Release (BC14)
The installation files can be found in the NAV 14.3.0.0 directory, which corresponds to the Dynamics 365 Business Central Spring '19 Release.
The installation set contains the following directories:
| Folder | Contents |
|---|---|
DOCUMENT CREATOR |
The Document Creator extension/app. |
DOCUMENT CREATOR UTILS |
The Document Creator Utilities extension/app + C/AL version. |
TEMPLATE |
Files for template reports, layouts and translations. |
-
The core features of Document Creator are included in the "Document Creator" extension, i.e., creating/editing/importing/exporting/archiving/converting layouts, export profiles, etc.
-
The translation features and report utility functions that can be used in report objects are provided within a separate "Document Creator Utilities" extension. A C/AL version of the objects from this extension are available as well, which you may prefer if you still want to be able to use these features in C/AL report objects again as well.
-
The template report objects are provided with a "Document Creator W1 Templates" extension. You can use the source code of the report objects from this extension as a starting point for your own reports. A C/AL version of the template report objects are available as well.
To install Document Creator, please follow these steps:
-
Publishing the "Document Creator" extension
Open the Business Central Administration Shell (as admin) and run the following command to publish the new extension to your database:
Publish-NAVApp -ServerInstance $ServerInstance -Path "...\DOCUMENT CREATOR\Apportunix_Document Creator_$version.app"(With
$versionbeing the version of the app you are going to install and$ServerInstancebeing the name of the target BC server instance.) -
Installing the "Document Creator" extension
If you are not upgrading from a previous version of the extension, see 2.A. If you are upgrading from a previous version of the extension, see 2.B.
A. Install the extension either through the Install action on the Extension Management page, or run the following command(s):
Sync-NAVApp -ServerInstance $ServerInstance -Name "Document Creator"
Install-NAVApp -ServerInstance $ServerInstance -Name "Document Creator"
B. At this point you will have two versions published to the database. In the Extension Management page you will see the old version is Installed, while the new version is only Published/Not installed.
Run the following commands to sync the app and start the data upgrade:
Sync-NAVApp -ServerInstance $ServerInstance -Name "Document Creator" -Version $version
Start-NAVAppDataUpgrade -ServerInstance $ServerInstance -Name "Document Creator" -Version $version
At this point, you will still have two versions of the extension published, but now the new version is installed and the old version only published.
-
Publishing and Installing the "Document Creator Utilities" extension
If you want to use translation features and report utility functions from AL only, see 3.A. If you want to use translation features and report utility functions also from C/AL, see 3.B.
A. Open the Business Central Administration Shell (as admin) and run the following command to publish the extension to your database:
Publish-NAVApp -ServerInstance $ServerInstance -Path "...\DOCUMENT CREATOR\Apportunix_Document Creator Utilities_$version.app"Then, install the extension either through the Install action on the Extension Management page, or run the following commands:
Sync-NAVApp -ServerInstance $ServerInstance -Name "Document Creator Utilities"
Install-NAVApp -ServerInstance $ServerInstance -Name "Document Creator Utilities"
If you are upgrading from a previous version of the extension, follow the instructions as described in the previous step to run the data upgrade in the same way for this extension.
B. Start the Dynamics NAV development environment and import the
NAV<version>_NewObjects.fobfile.Import the menu-suite from the
NAV<version>_MenuSuite1056.fobfile or edit the menu-suite object ID in theNAV<version>_MenuSuite1056.txtfile. -
Installing the Control Add-In
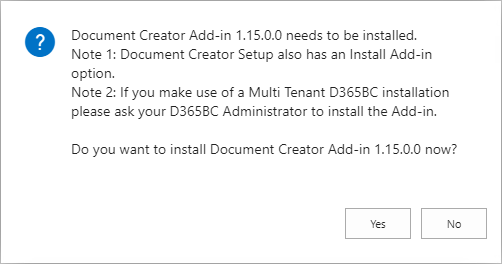
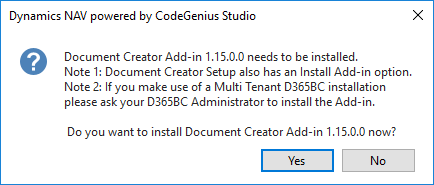
Open the client, the first time you will get this message:
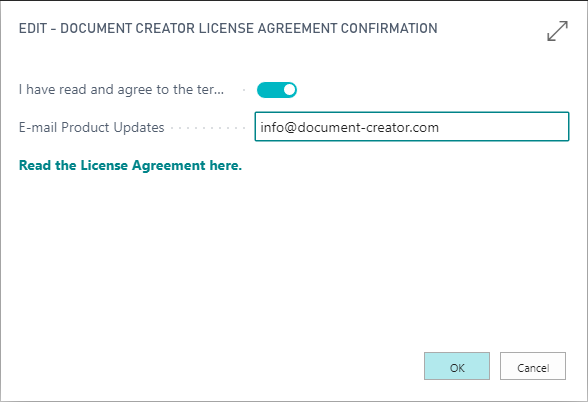
Choose "Yes"; Read and agree with the license agreement and enter your e-mail.
You will see a message once the installation has completed successfully.
-
Setting up your Product Key
To set up your product key, open the Document Creator Setup page:
a. Paste the product key in the "Product Key" field.
b. Invoke the Check Product Key action to validate the product key.
c. Invoke the License Information action for more information about the license.
-
Assign the "Apportunix Document Creator" permission set to your users.
-
Installing the W1 Template Reports
If you want to use the AL version of the W1 template reports, see 6.A. If you want to use the C/AL version of the W1 template reports, see 6.B.
A. First publish and then install the extension from the following file:
Apportunix_Document Creator W1 Templates_<version>.appThen, search for and open the Report Layouts page, choose 'Import Report Package' and import the following file:
LayoutPackage - W1 – DCR_Release_<version>.dcrB. Search for and open the Custom Report Layouts page in the Windows client, choose 'Import Report Package' and import the following file:
ReportPackage - W1 – DCR_Release_<version>.dcrThen, compile the Document Creator objects (filter on versionlist
@*DCR*). -
Importing the Template Translations
Search for and open the Configuration Packages page (RapidStart):
a. Choose Import Package and select the RapidStart package from the
TEMPLATEdirectory.b. Select the imported DCR package, choose Apply Package, then confirm. This imports a set of default translations for the Document Creator layouts.
Document Creator is ready for use!
Dynamics NAV 2015 – 2018 and Dynamics 365 Business Central Fall '18 Release (BC13)
The installation files are grouped into a directory for each target version (e.g., NAV 8.0.0.0 (CU01) corresponds to Dynamics NAV 2015). Make sure to use the files from the directory that matches your target.
The installation set for each target version contains the following directories:
| Folder | Contents |
|---|---|
APPLICATION OBJECTS |
New and Merge NAV Objects. |
TEMPLATE |
Files for template reports, layouts and translations. |
To install Document Creator, please follow these steps:
- Start the Dynamics NAV development environment and import the
NAV<version> - New Objects.fobfile. -
Merge the following NAV objects with the objects in file
NAV<version> - Merge Objects.txt:Type ID Name Applicable for NAV Version Codeunit 40 LogInManagement NAV2015 Table 9650 Custom Report Layout NAV2015 / NAV2016 / NAV2017 / NAV2018 / BC13 Codeunit 9651 Document Report Mgt. NAV2015 / NAV2016 / NAV2017 / NAV2018 -
Import the menu-suite from the
NAV<version> - MenuSuite - 1056.fobfile or edit the menu-suite object ID in theNAV<version> - MenuSuite - 1056.txtfile. - Compile the merged objects.
-
Open the Windows Client, the first time you will get this message:
Choose "Yes"; Read and agree with the license agreement and enter your e-mail.
You will see a message once the installation has completed successfully.
-
Navigate to (or search for) 'Departments | Document Creator | Document Creator Setup':
a. Paste the product key in the "Product Key" field.
b. Choose Check Product key to validate the "Product Key".
c. Choose License Information for more information about the license.
-
Navigate to (or search for) 'Departments | Document Creator | Custom Report Layouts':
a. Choose 'Import Report Package...' and select the
ReportPackage - DCR_Release_<version>.dcrfile from theTEMPLATEdirectory. This imports a default set of layouts and also the report objects (from the FOB file in the package).b. Compile Document Creator objects (filter on versionlist
@*DCR*). -
Navigate to (or search for) 'Administration | Application Setup | RapidStart Services for Microsoft Dynamics NAV | Configuration Packages:
a. Choose Import Package and select the RapidStart package from the
TEMPLATEdirectory.b. Select the imported 'DCR' package, choose Apply Package, then confirm. This imports the default translations for the Document Creator layouts.
Document Creator is ready for use!
Data Upgrades during BC Upgrades
This chapter describes how you can migrate data stored by Document Creator while upgrading to a newer version of Dynamics 365 Business Central.
From BC15 and up to the latest BC version
When upgrading to a new major or minor update of Business Central, make sure to publish the latest available runtime package for your platform.
Also, make sure to sync the extension (Sync-NAVApp), and run a data-upgrade (Start-NAVAppDataUpgrade) if necessary (i.e., in case you install a newer version of Document Creator than the version that was installed in your current environment).
For more information, please consult the Publishing, Upgrading, and Installing Extensions During Upgrade page.
From BC14 to BC15 and up
Tip
Instead of following this data migration guide, you can also choose to only export the data you need (i.e., typically only the translations), uninstall and purge the data from the old app, and install the new app after the upgrade. Considering a Business Central upgrade is not easy to follow/execute for just anyone, this is also a recommended upgrade path.
To migrate Document Creator table data during an upgrade from Business Central 14.x to newer Business Central versions (15.x and up), please follow these steps:
In the Current Environment (Before the BC Upgrade)
- Have the latest version of the "Document Creator" (and "Document Creator Utilities") app installed.
- Publish, sync and install the "Document Creator Upgrade Data" app.
- Publish, sync and install the "Document Creator Source Data Migration" app. Code for migrating data will be run automatically.
- Uninstall the "Document Creator Source Data Migration" and "Document Creator" (and "Document Creator Utilities") app.
- Finally, upgrade the environment to the new Business Central release.
In the Upgraded Environment (After the BC Upgrade)
- Publish, sync and install the "Document Creator" and "Document Creator On-Premise" app.
- Publish, sync and install the "Document Creator Target Data Migration" app. Code for migrating data will be run automatically.
- Uninstall the "Document Creator Target Data Migration" and "Document Creator Upgrade Data" app. You can run a
Sync-NavAppwith-Mode Cleanto purge all upgrade extension data from the database. - Follow the further installation instructions from the Dynamics 365 Business Central 2019 release Wave 2 and up (BC15+) section.
You can download the (source code of the) Data Upgrade Extensions from the Apportunix Downloads drive.
To newer Dynamics NAV versions
The table schemas of Document Creator for Dynamics NAV are upwards compatible, meaning that if you want to upgrade to a newer NAV version you can simply use the existing table definitions in the upgrade process. Please make sure that you install the latest version of Document Creator for the applicable target version as described in the Dynamics NAV 2015 – 2018 and Dynamics 365 Business Central Fall '18 Release (BC13) installation instructions.
